
What are Forms ?
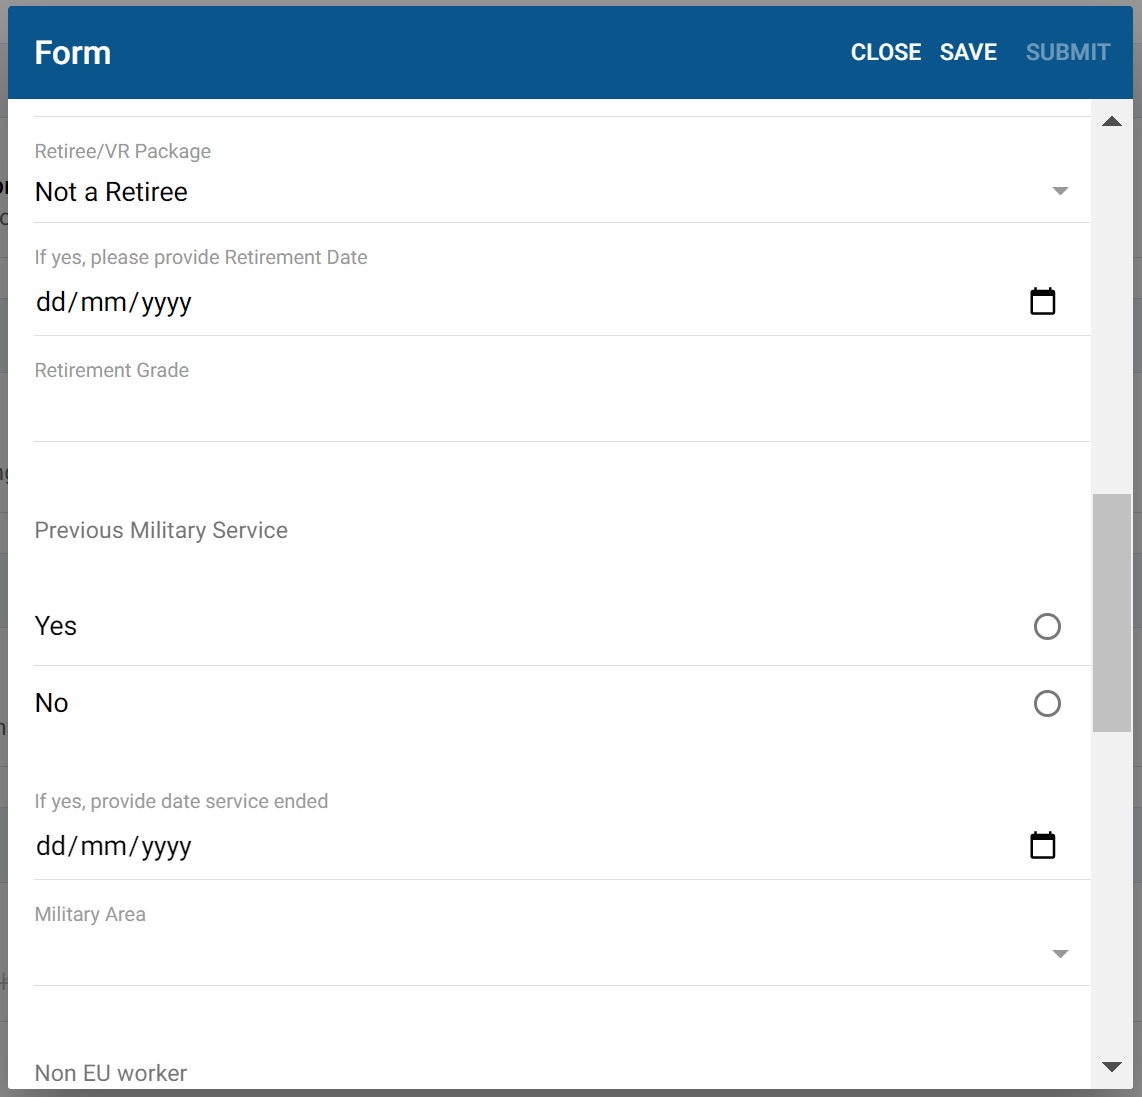
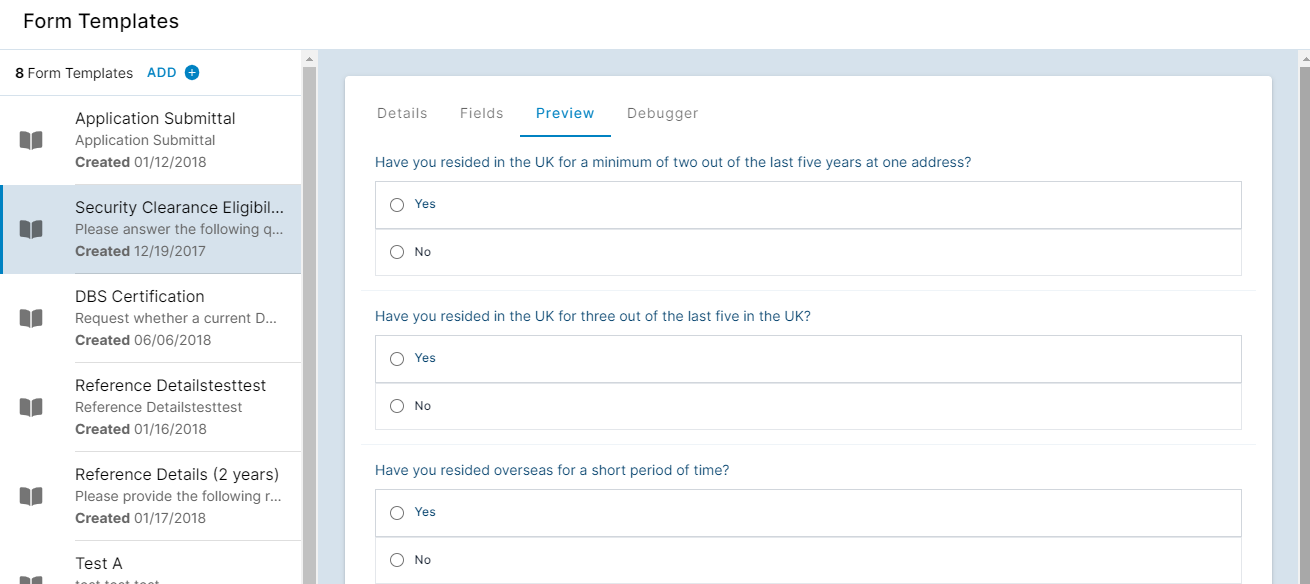
Forms can be added to vacancies to enable you to collect additional information from applicants during the application process. They allow collecting free data such as text and numbers, as well as posing multiple choice questions to applicants:
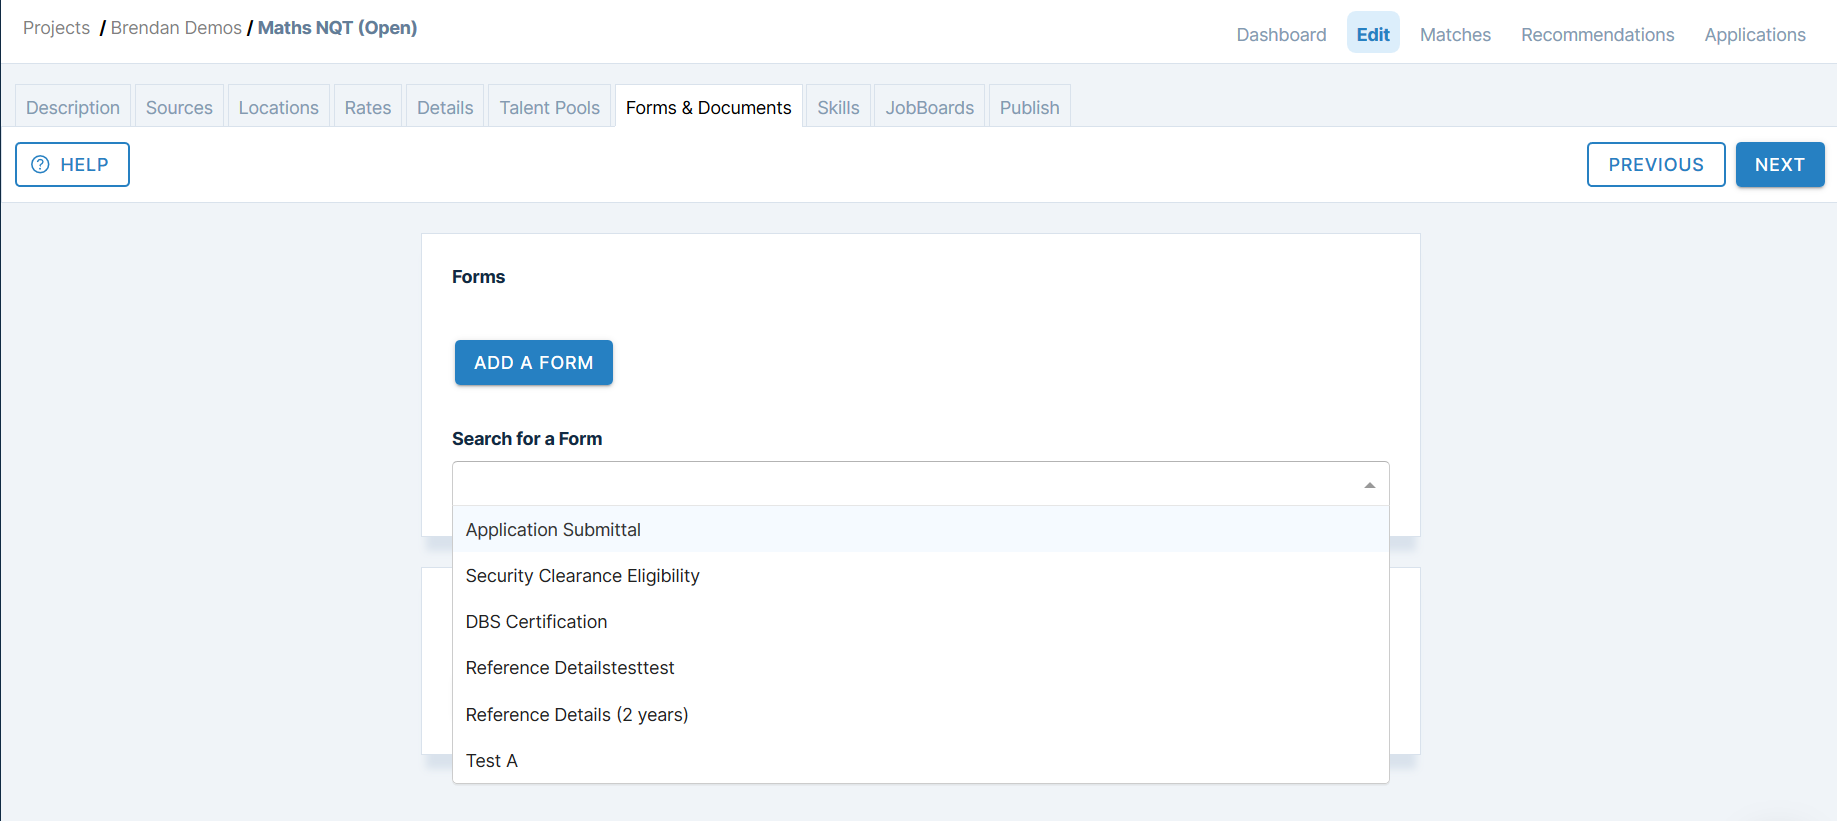
Forms are typically configured by our Client Services team, and assigned to your account. You can then add forms to a vacancy in the Forms and Documents section of the vacancy Wizard:
Have an idea for new forms you want to build? Feel free to reach out to us, and we will be happy to help!
You can also build your own Forms if you are the Administrator of your account.
Understanding the form builder
Creating a form involves building a configuration object, the form template, which is used to control what questions are exposed to candidates. The candidate's responses to your form template are stored as a collection of values.
Form templates consist of several components:
- Name. A short, descriptive name for the field.
- Description. A description of the form, or instructions for the candidate on how to complete the form. This is visible to candidates when they complete the form.
- Remember Form Values Across Applications. This toggle button makes completing forms easier for candidates where they may be applying to multiple vacancies. Disable this toggle if you want to ensure candidates always have to re-enter details in your form when applying to a new vacancy.
- Fields. These are the set questions you wish to ask, the available answers, and how the details should be stored. This is the most important part of the form, as it controls how your form will display to candidates.
- Digital Signature Allows candidates to digitally sign their Forms
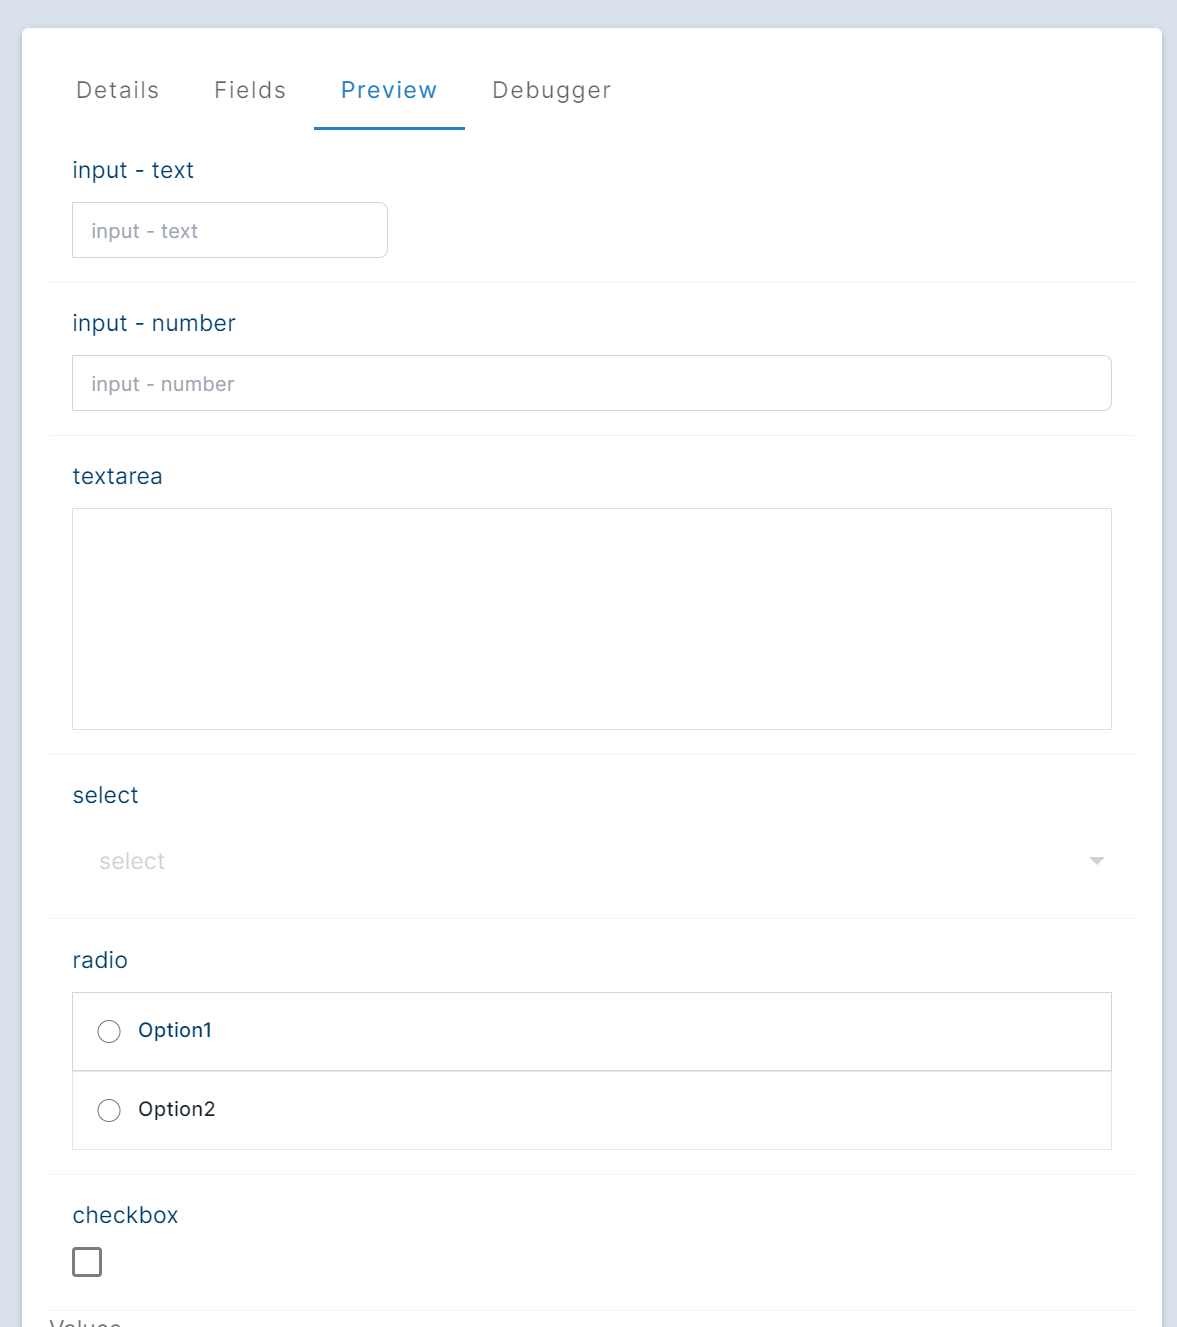
We currently support five types of field:
- input. Input fields allow users to enter a free-text value in response to a question. This could be text, a date, a number, or an email
- text area. Text areas are for requesting multi-line data. Useful for collecting longer details such as reviews or comments.
- select. A select box provides a "drop-down list" of values for a candidate to pick from. Only one of the values may be selected.
- radio. Similar to the select input, this provides a set of values for the candidate to pick from. Only one of the values may be selected.
- checkbox. This is a tick box that may be either true or false.
The following shows an example of how each of these field types are displayed to candidates:
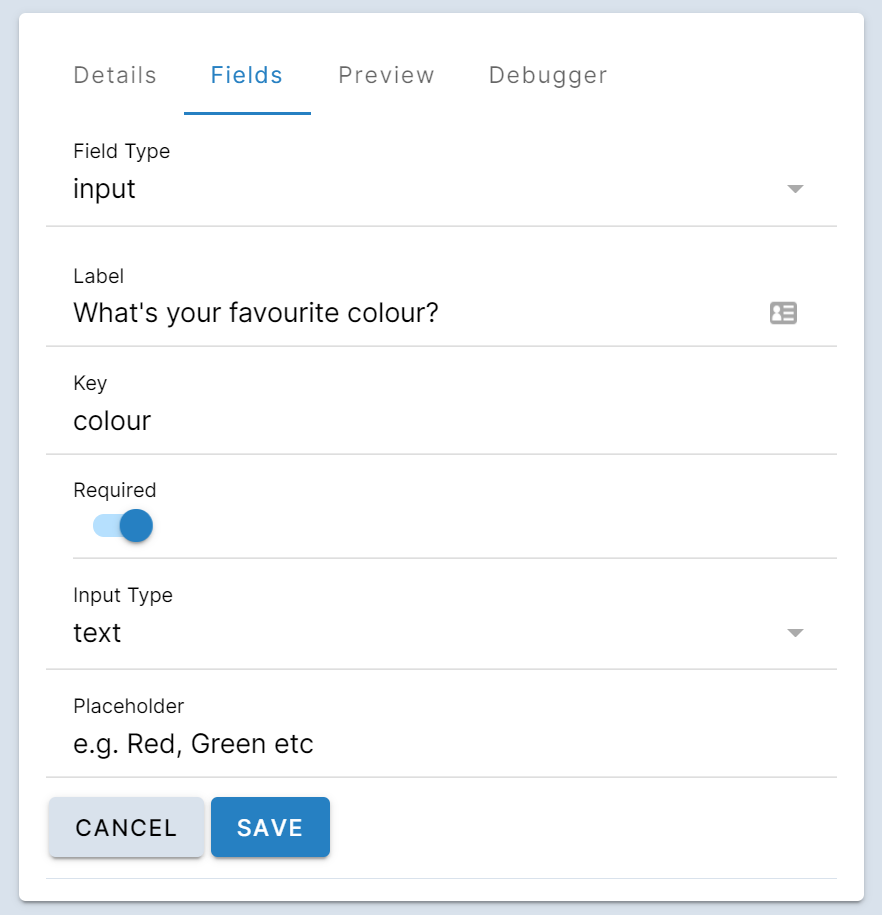
In addition to field type, each field also has some additional properties:
- Label. This is the question that is displayed to users above the field.
- Key. The key is a unique text value that identifies the field in the form. We automatically generate a value based on the label provided, but you may change this if you desire. The value must be all lower case, without spaces or symbols.
- Required. If enabled, the candidate must provide a value for the field.
- Placeholder. Input and text area fields allow you to show a value in the field, before the candidate has entered anything. This can be useful for showing the format of the data.
Creating a new form
To view and add forms on your account:
- Click the Settings icon on the left-side menu bar, and go to the Form Templates section
- Here you will find a list of forms already added to your account
- To create a new one, click on the blue Add button on the top of this list. This will take you to the form builder.
- Add a Name and Description for the form.
After creating the form you will see it in your list of Forms. Click on the Form you wish to build and you will be taken to the form editor:
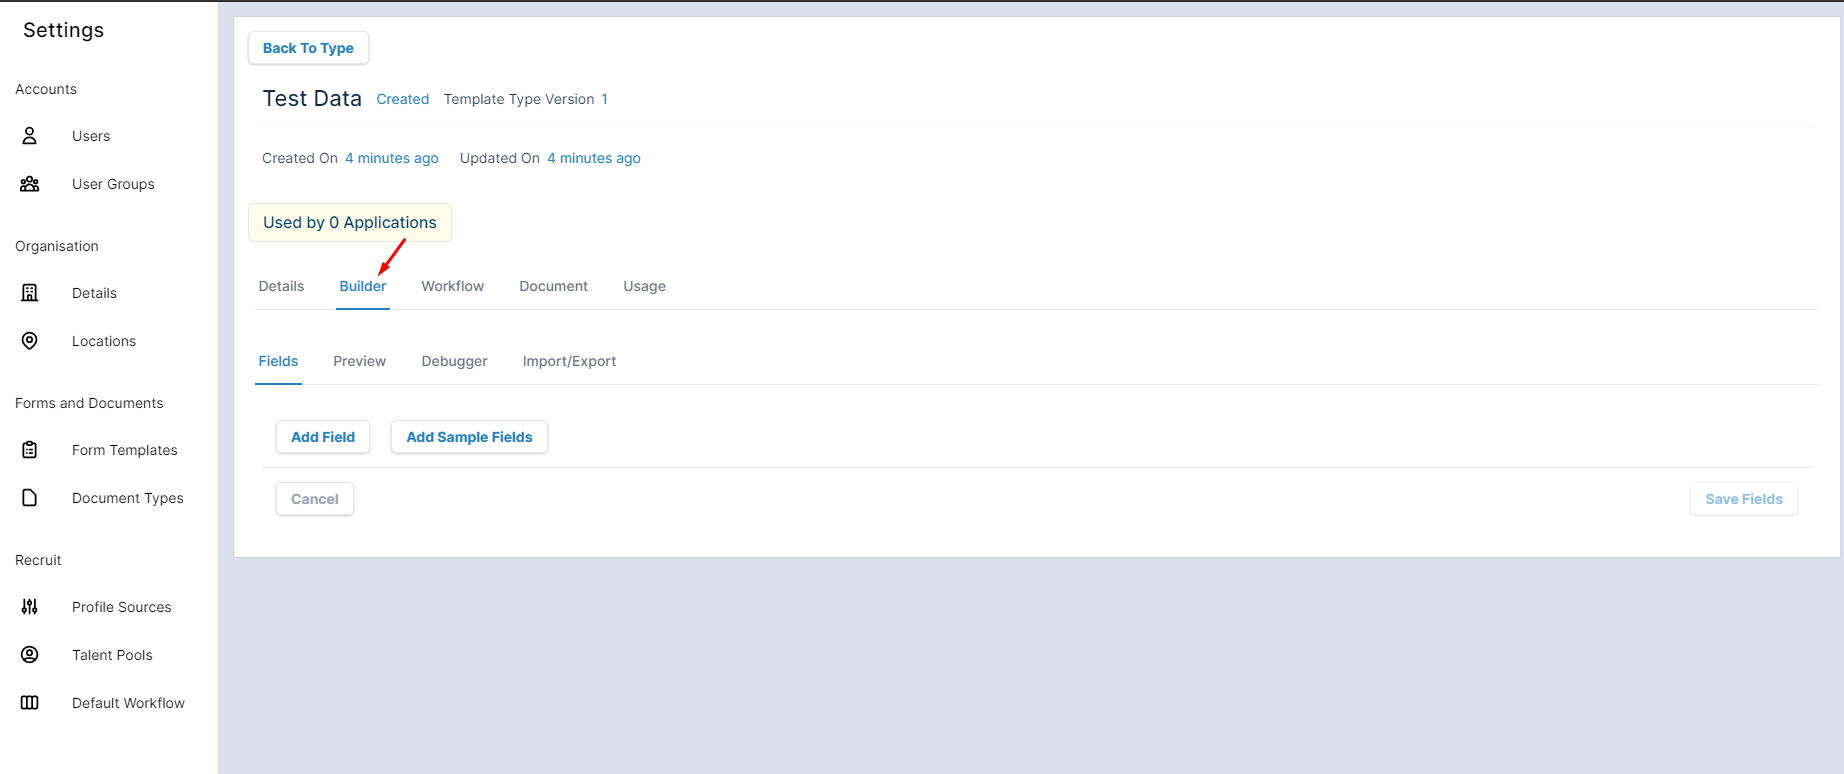
This editor has four tabs:
- Fields. Add new fields to your form. Click
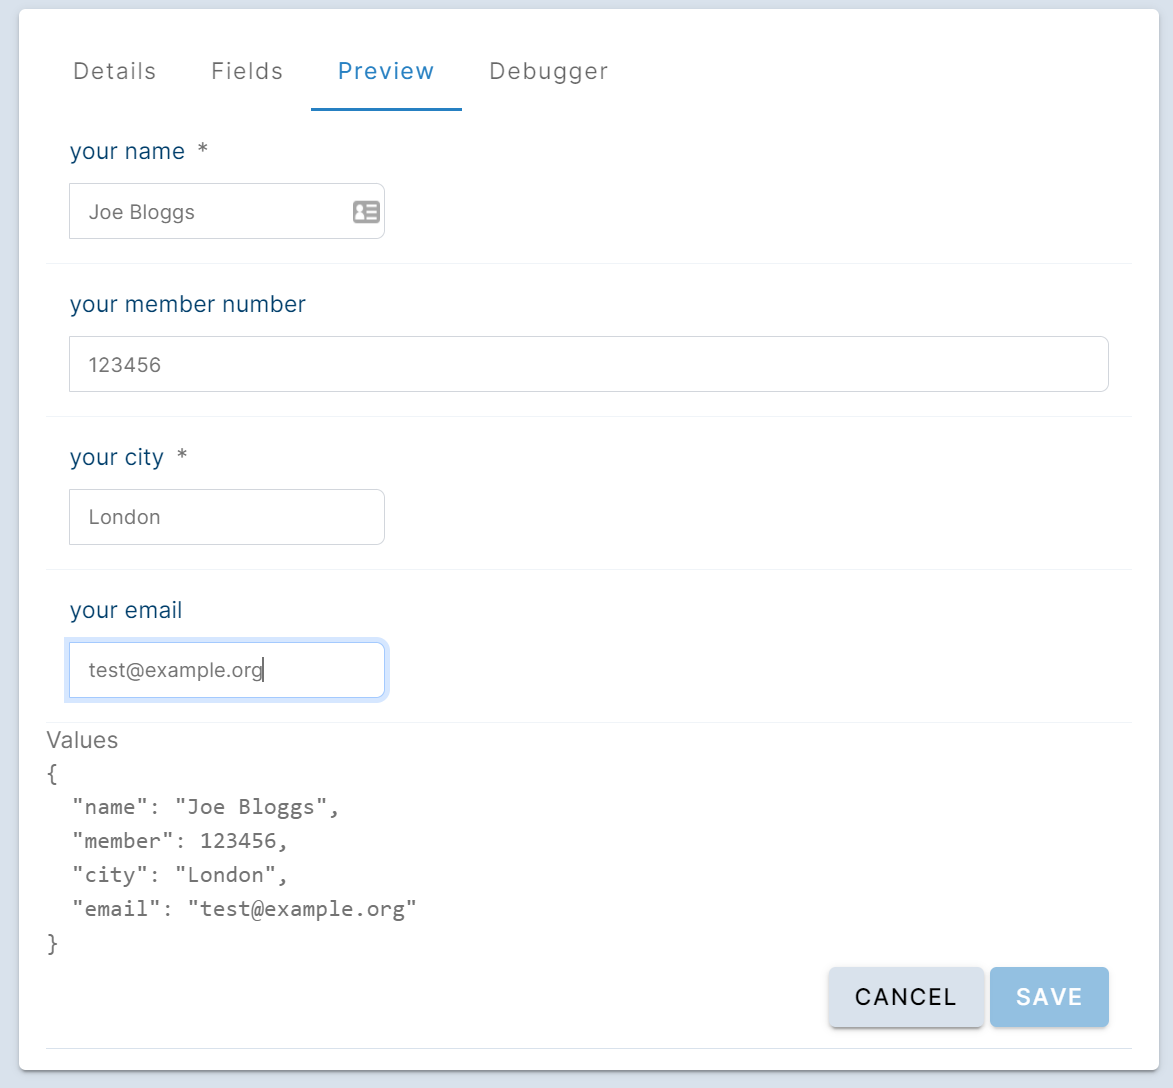
Add Fieldto add a new field, or clickAdd Sample Fieldsto add an example of several fields.Selecta field to edit the details of the field. - Preview. See an example of how your form will look to candidates in this tab. You can also see how the values entered by the candidate will be collected as you enter values into the form
- Debugger. This tab displays the raw configuration values for your form in JSON format. You should generally not use this tab unless you're familiar with JSON and the Formly data format.
- Import/ Export
- Once you are happy with your Form you can add the workflow.
- Click on Document to toggle any of these you wish to add:
- Remember Form values which makes completing forms easier for candidates where they may be applying to multiple vacancies
- Generates a Document
- Requires signature. This includes a digital signature box on the Form for the candidates to sign.
Once you are happy with all the changes made to your form, click
Save . Your new form can now be added to vacancies for candidates to complete.